How to Use ManyChat + Zapier to Integrate Chatbots with Your Tech Stack

Written by Andrey Lipkovskiy
February 14, 2018
Can you name something better than an integration that gives business owners and marketers hundreds of ways to integrate Facebook Messenger bots into their current business systems and tools?
We didn’t think so.
That’s why ManyChat and Zapier officially launched an integration in September 2017—and what a great five months it’s been since!
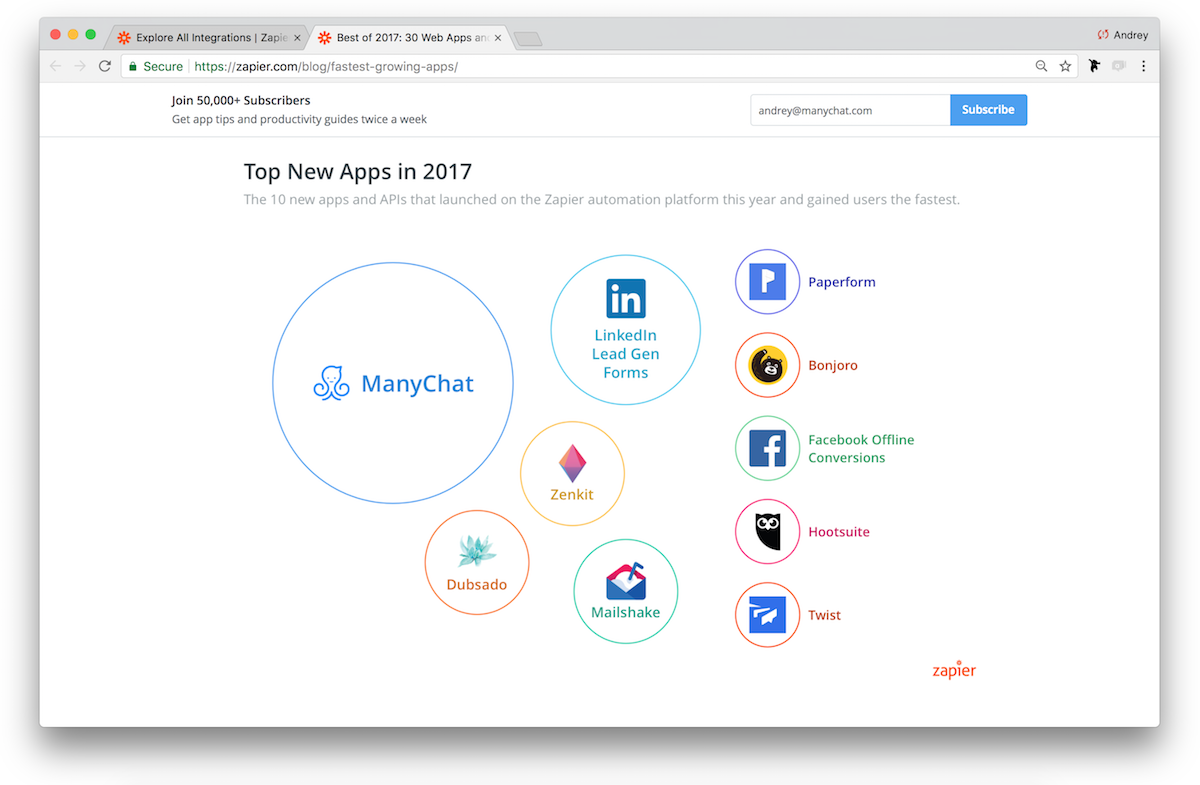
On December 2017 ManyChat was listed as this year’s fastest growing new app on the Zapier automation platform: Best of 2017: 30 Web Apps and Software Trends That Ruled the Workplace
Check any brand’s Facebook Page, and under nearly every post will be questions about pricing, features, and a half-dozen other things people are curious about. You don’t have time to answer every question, but ManyChat—this year’s fastest growing new app on Zapier—does. Use it to build Facebook Messenger bots that automatically answer your customers’ most common questions. Then follow up with scheduled replies that offer discounts or share tips about your product and close the sale.
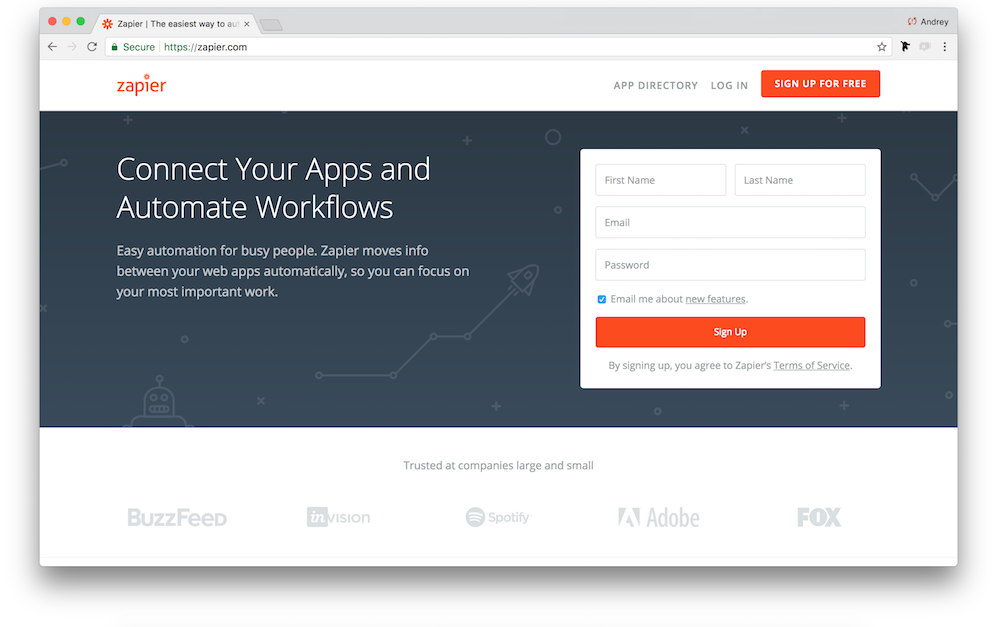
What is Zapier?
Zapier is an online automation tool that allows you to connect ManyChat to Google Sheets, Slack, MailChimp, ActiveCampaign and 1000+ other apps. You can connect two or more apps to automate tasks without coding and move the information between them.
This gives you unlimited opportunities for using the ManyChat Messenger Marketing platform together with your favorite CRM and email marketing services.
For example:
- add a lead in your CRM when you get a new subscriber in ManyChat
- ask a subscriber for an email / phone number inside the bot and add it to your email marketing service / CRM
- register subscribers to a webinar with one tap
- and much more…
You can connect two or more apps to automate repetitive tasks without coding or relying on developers to build the integration and move info between your web apps automatically—so you can focus on your most important work.
It’s easy enough that anyone can build their own app workflows with just a few clicks.
Long story short, Zapier is the “connector” between tools in your business.
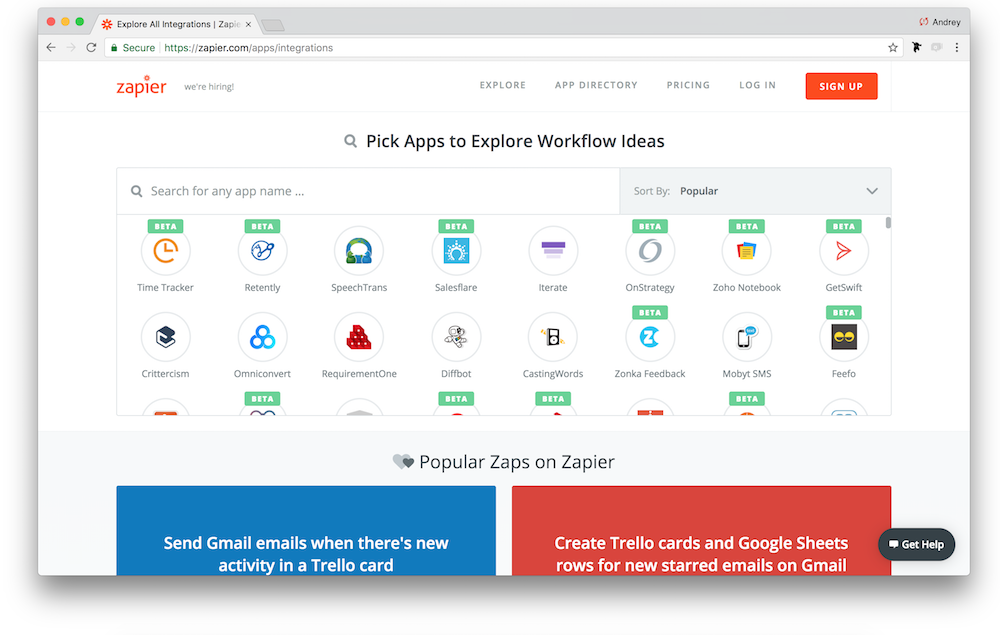
On Zapier’s main page you can search for different apps to check possible integrations and grab some workflow ideas. After you pick one or multiple apps, you can explore the most popular Zaps and app details:
- Description
- Actions
- Triggers
- Searches
How it Works: Triggers, Actions and Searches
- Trigger is the event in an app that starts the Zap. Once you set up a Zap, Zapier will monitor the app for that event.
- Action is the event that completes the Zap. You can create 2-step Zap or make it more complicated adding more Action steps.
- Search is the event that allows you to look up for a subscriber in your Audience list by ID, Name or User Custom Field and send them a message / content or perform any other Action.
For example, as soon as your ManyChat subscribers get a Tag, they immediately receive an email from you with the instructions, company credentials or whatever you want to send them (when using “New Tagged User” trigger make sure you already have their email in Custom User Field or ask for their email address in a conversation with User Input before adding a Tag).
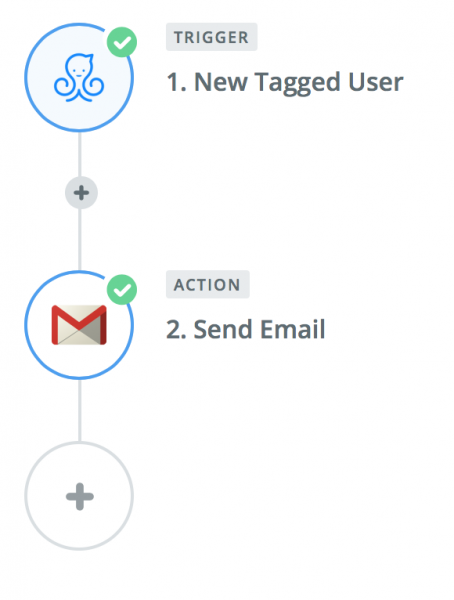
With this + button you can add more Actions to create more complicated workflows: as soon as you have their email address, you can add them to MailChimp (or another like ActiveCampaign and GetResponse) or to your favorite CRM service.
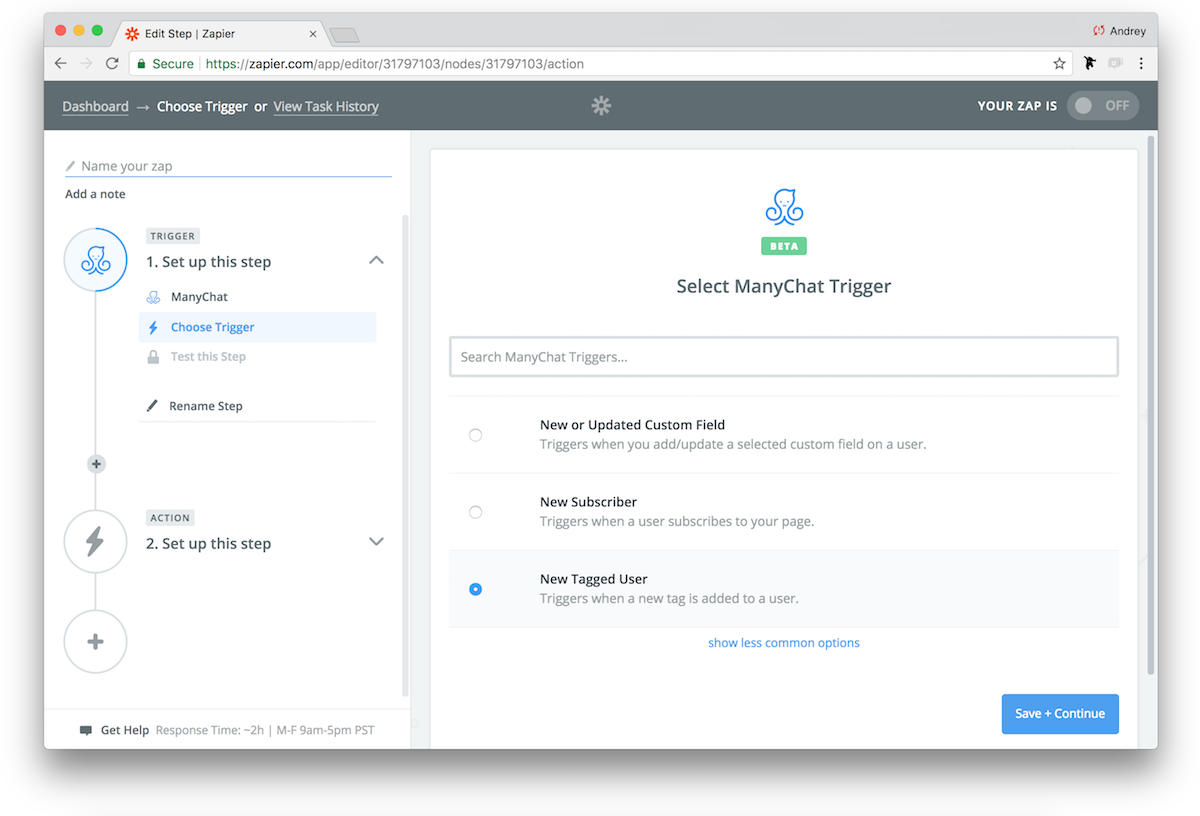
Supported Triggers
- New or Updated Custom Field — triggers when you add/update a selected Custom Field for a user (for example, their email address).
- New Subscriber — triggers when a user subscribes to your bot.
- New Tagged User — triggers when a new Tag is added to a user.
- New “Trigger a Zap” Event — triggers when your bot sends the “Trigger a Zap” event.
- Chat Opened — triggers when a chat is opened with a user.
Supported Actions
- Subscribe User to Sequence — subscribes a user to a Sequence.
- Unsubscribe User From Sequence — unsubscribes a user from a Sequence.
- Send Text Message to User — sends a text message to a user.
- Set Custom Field — adds or updates a custom field value for a user.
- Add Tag to User — adds a Tag to a user.
- Remove Tag From User — removes a Tag from a user.
- Send Content to User — allows admins to trigger whole flows right from Zapier that have pictures, videos, cards, User Inputs and Delays.
- Send Dynamic Message to User — allows admins to send messages with dynamic content right from Zapier.
Supported Searches
- Find User by Name — finds a user by name.
- Find User by ID — finds a user by ID.
- Find User by Custom Field — allows admins to find users inside their ManyChat list by email without having to sync User IDs between systems.
Learn more about how Zapier works here.
How to Get Started with ManyChat on Zapier
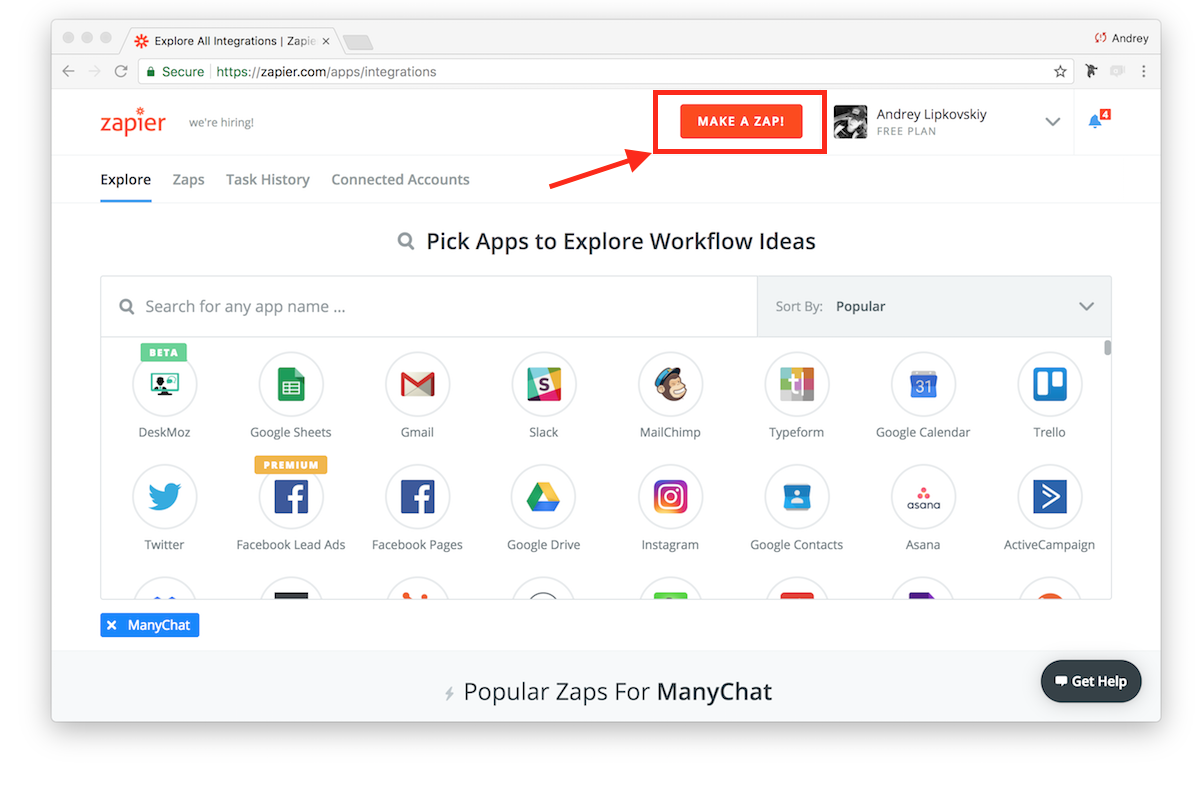
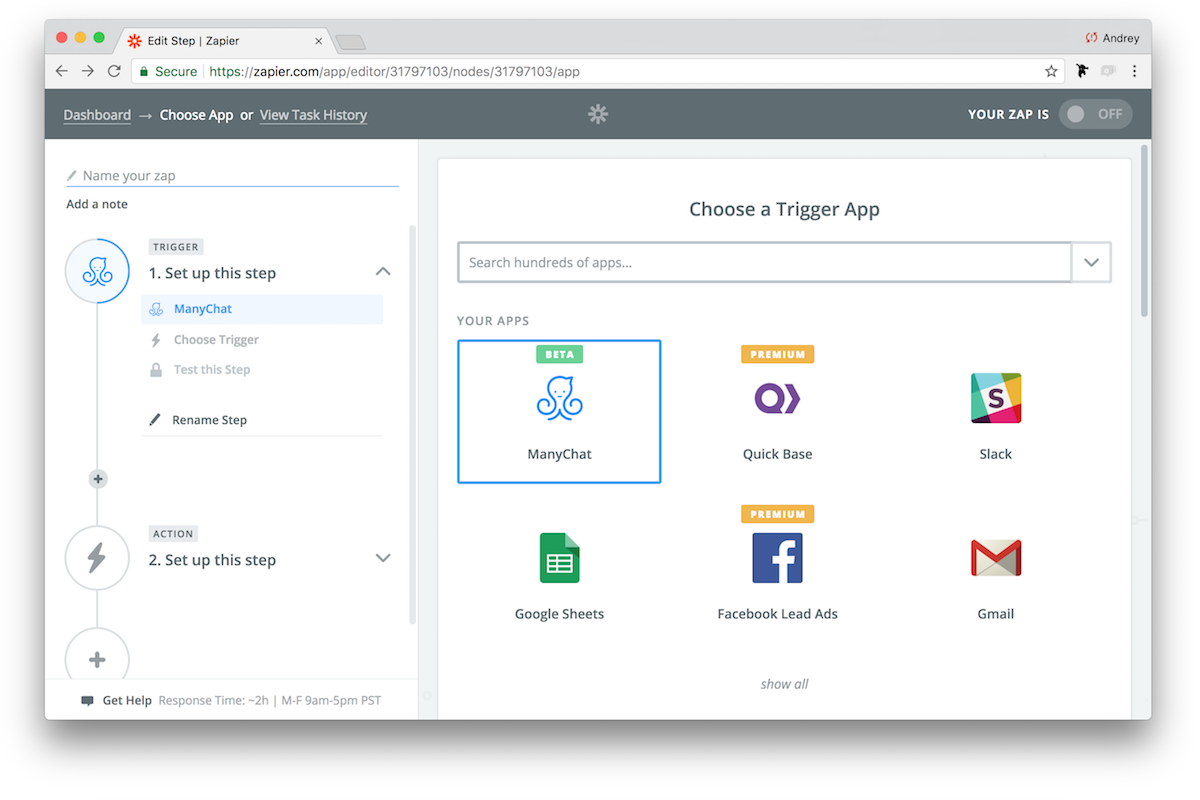
To get started, you’ll need a Zapier account and a ManyChat Pro account. To create your first Zap with ManyChat, click “Make a Zap” button.
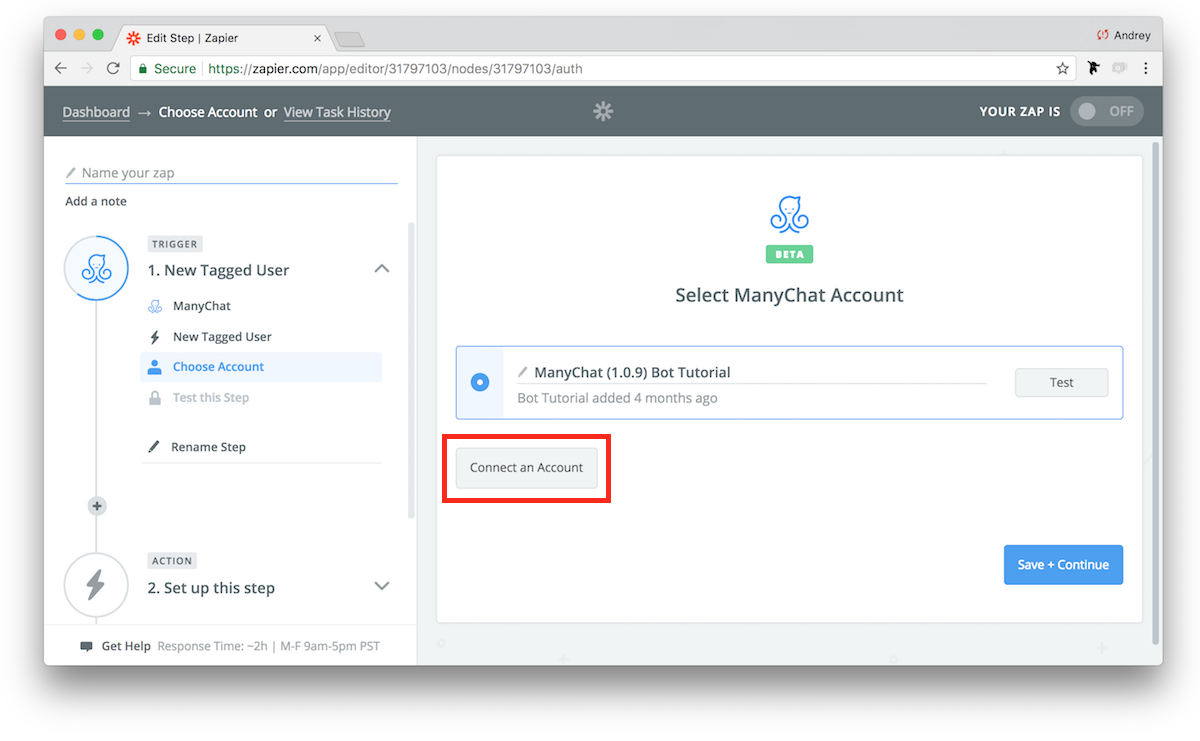
All your connected accounts will show up here. You can select existing or connect a new one by pressing Connect an Account Button.
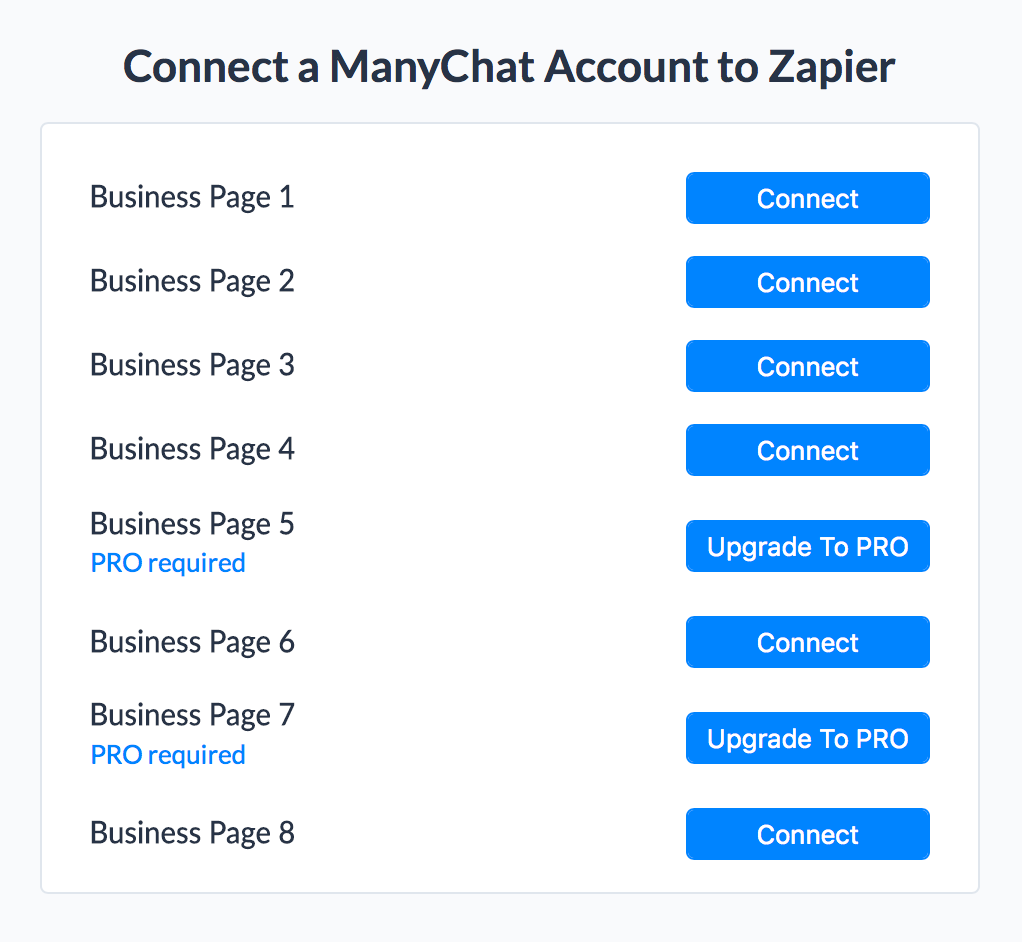
Select one of your accounts and press “Connect” (your Free Subscription accounts will show up with “Upgrade to PRO” button). Selected account will be added to your Zapier so you can use it in this Zap or connect a new one.
Test your connection with “Test” button to make sure your account is successfully synced.
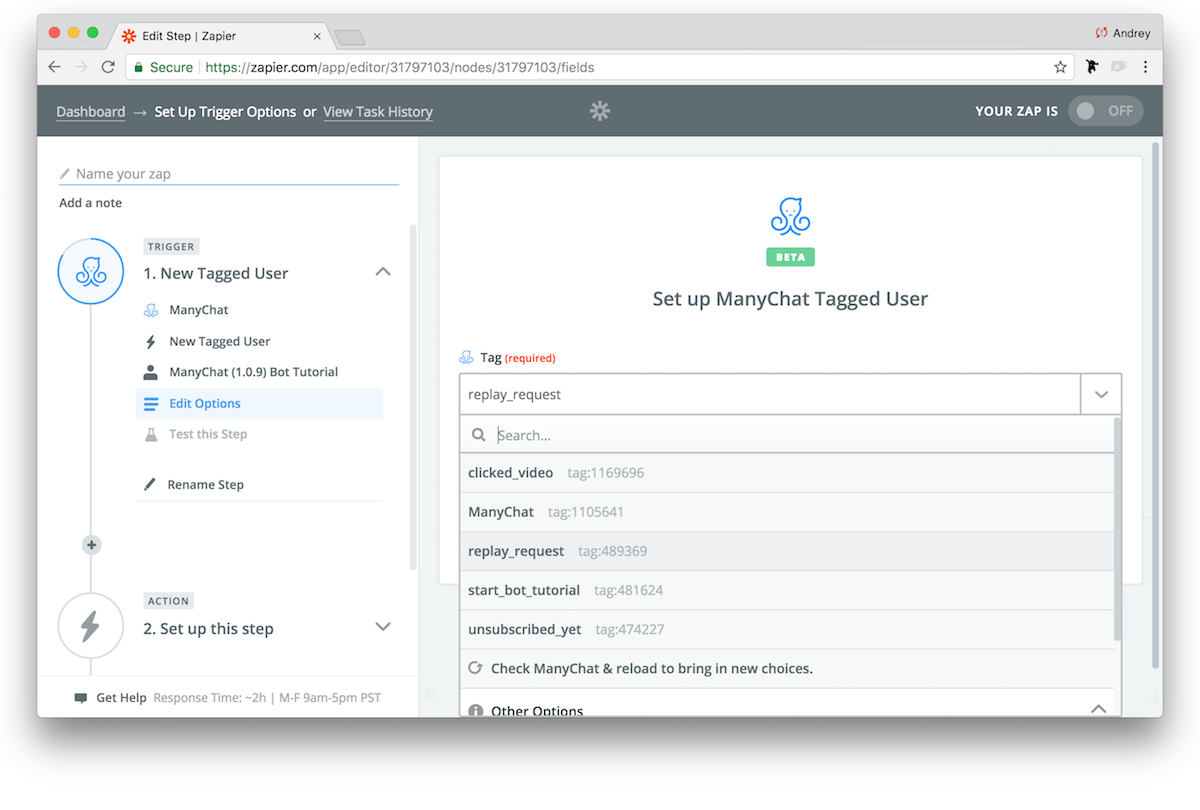
After you create a Trigger, Zapier will fetch one of your recent users to run a test (Zapier will use them as a sample only), make sure this user meets your Trigger conditions.
Select the desired Tag (in case you use New Tagged User option) in a drop-down menu.
Test this step.
If you have a subscriber (it could be you) inside ManyChat, Zapier will find them and return Success message.
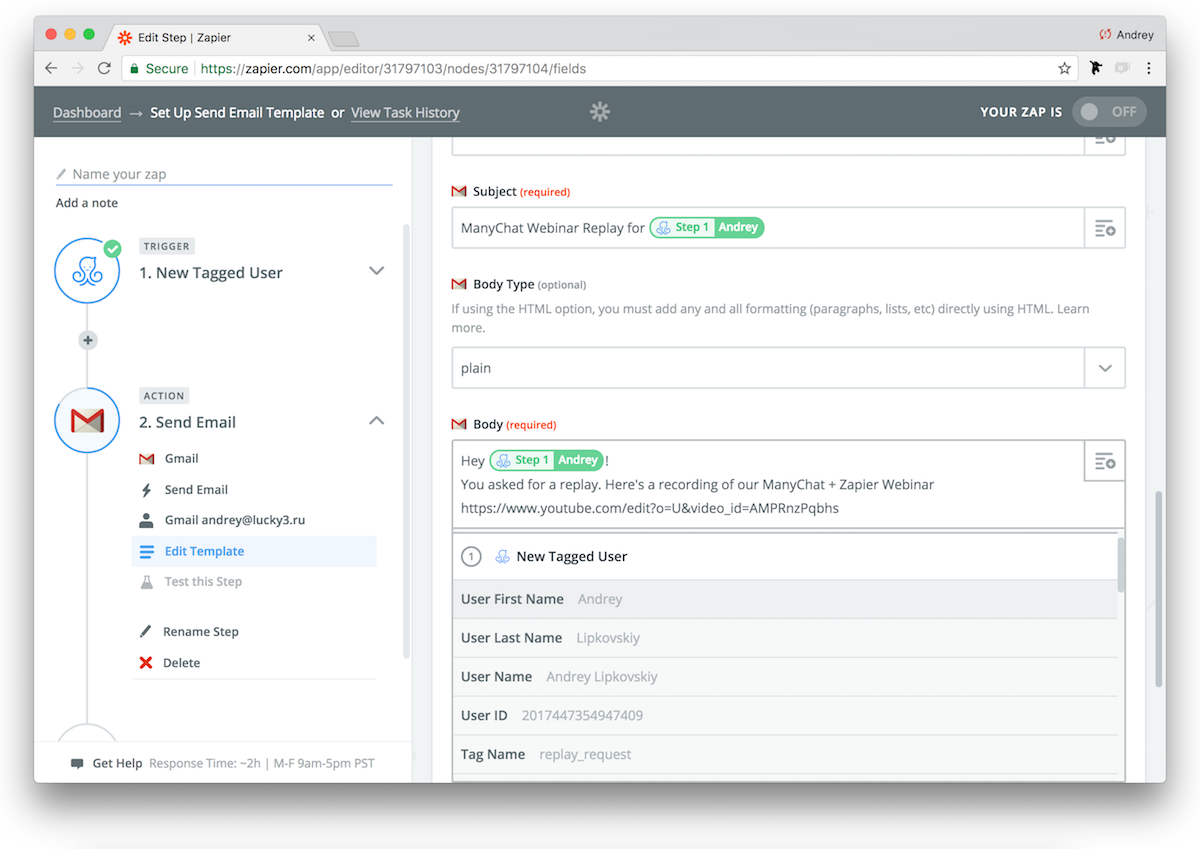
Now, set up your Action step. To test, we used Gmail app with Send Email option to send a message to each subscriber tagged in my ManyChat account with replay_request Tag.
The instructions are the same — find the app you want to use, select the Action you want to perform, and connect your existing account (of course, you need to have one in the app you set as an Action).
Notice that you’ll be able to customize the message sent, which will go a long distance with your subscribers who will appreciate not receiving the same old template 😉
You can grab user information and Custom User Fields with different user responses in your message template to make it more personal. Click the button on the right to see all the fields you can insert in your message.
After you finish with the template, Zapier will ask you to test this step and send a test email to your test user.
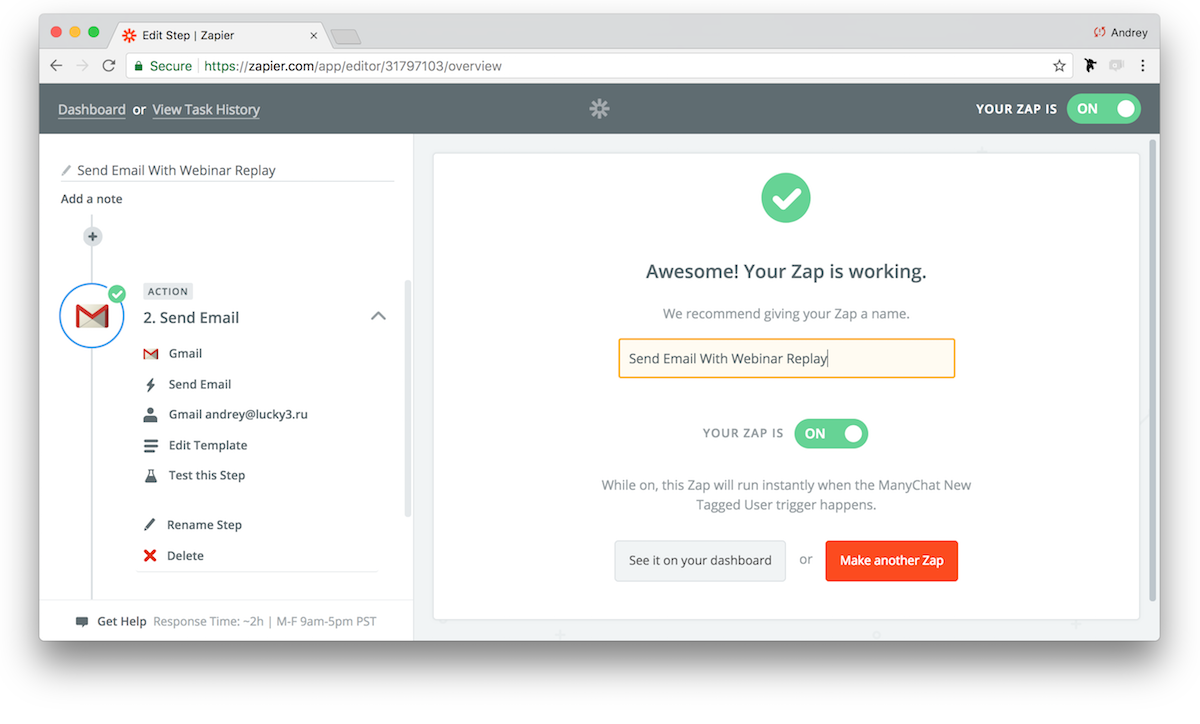
Once you create your Zap and all complete all the steps, you will see the last pop-up where you can name your Zap and activate it.
Ta-da! Your Zap is working!
This means that your tagged subscribers will receive an email from you immediately!
Triggering a Zap Event
You can also trigger a Zap without performing any actions like tagging your subscribers or updating their Custom User Fields.
To trigger a Zap Event, make sure your Page is connected to Zapier. This is pivotal, because until you do this, you won’t be able to see that option in Actions.
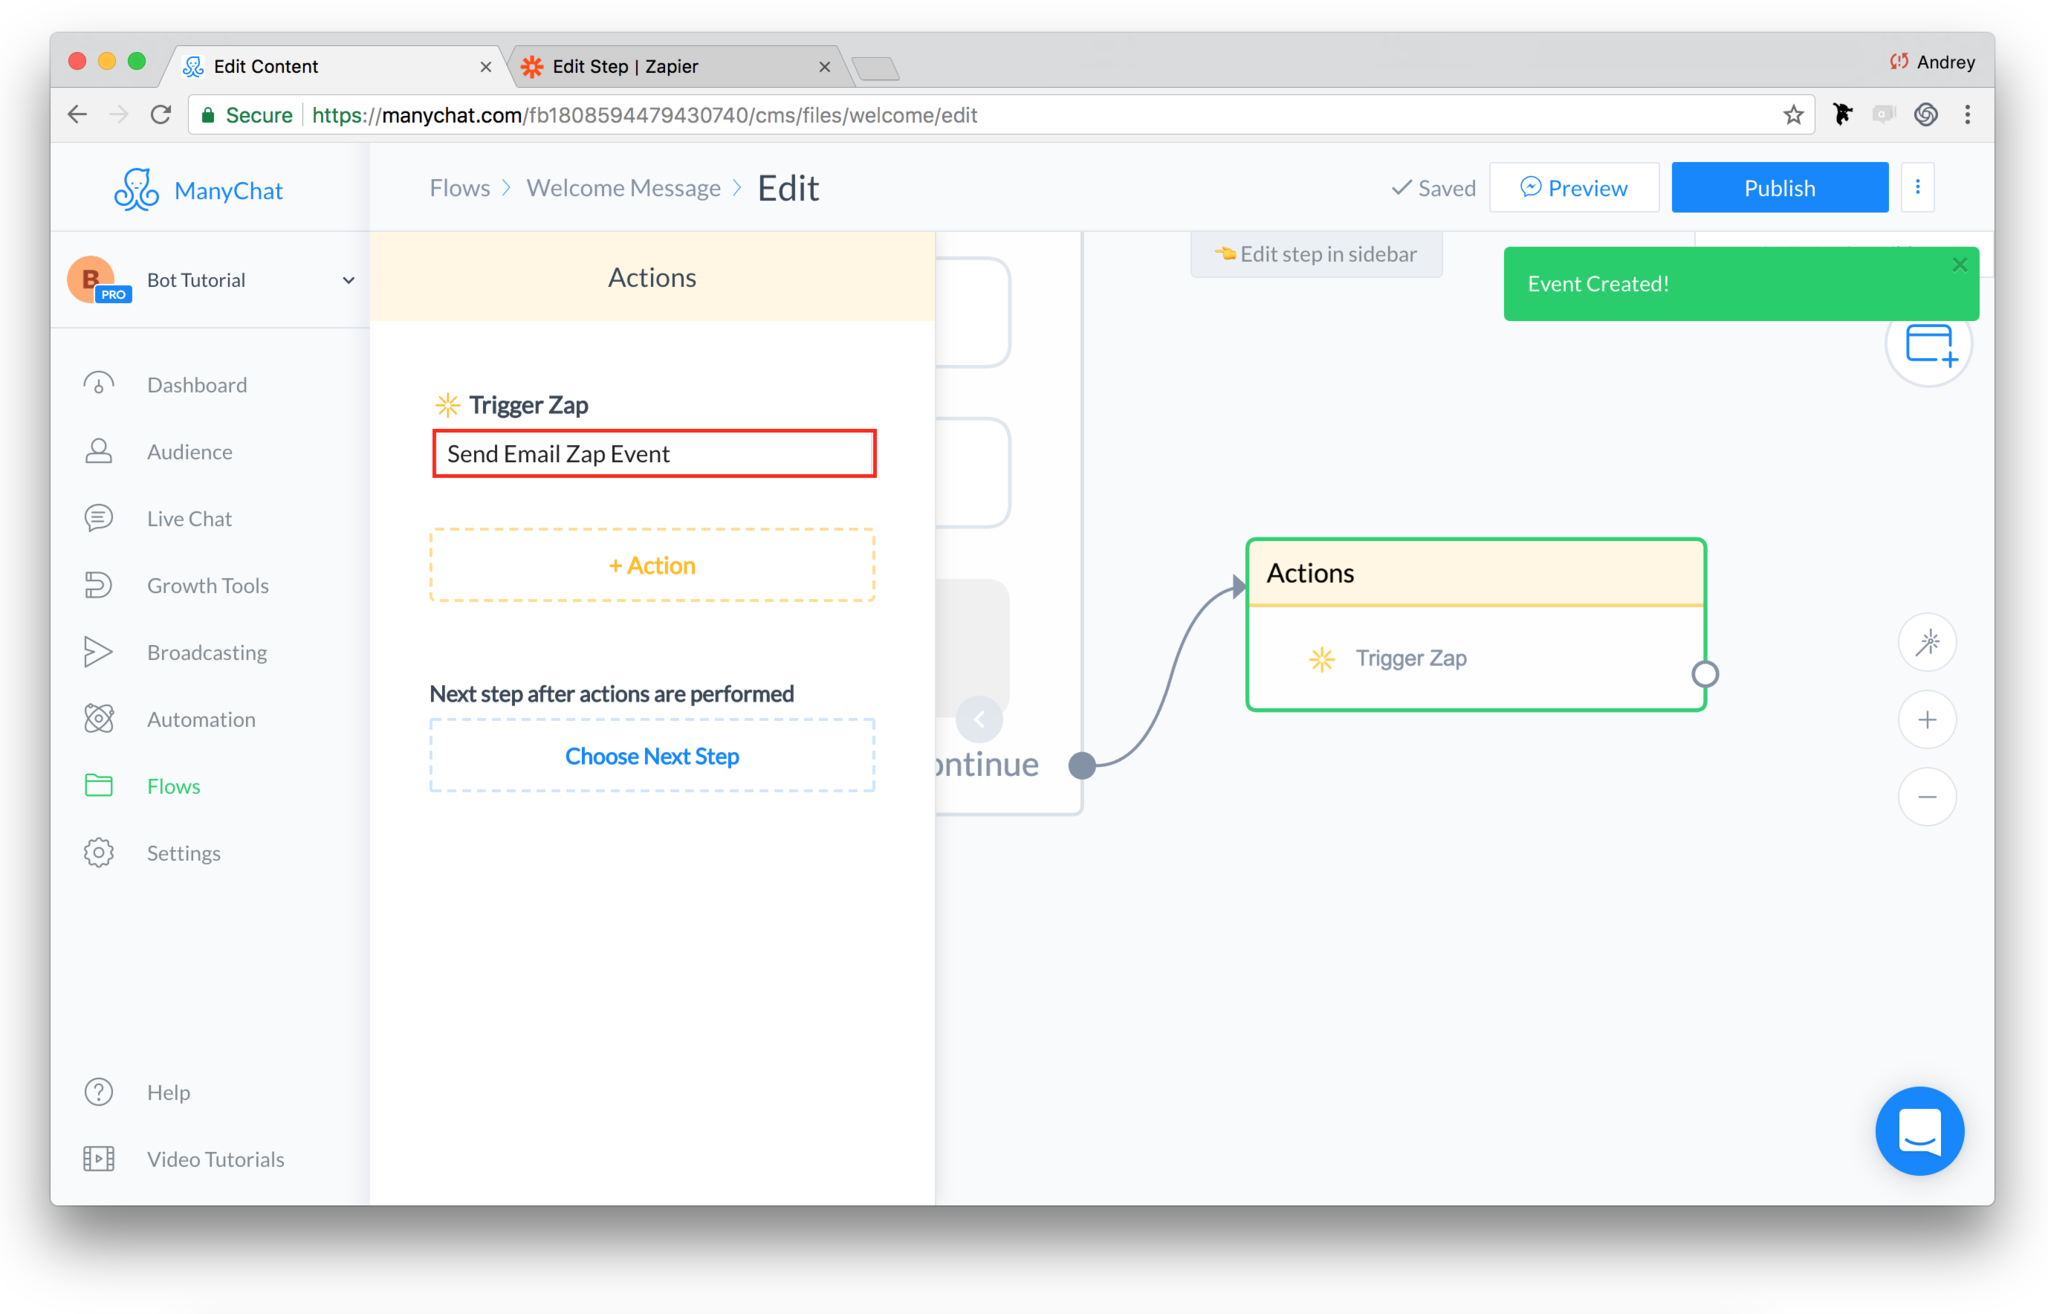
After you’ve connected them, create an Action Step with the Trigger Zap Action.

Now name your Event so you can easily find it inside Zapier later. You will see Event Created! message when done.
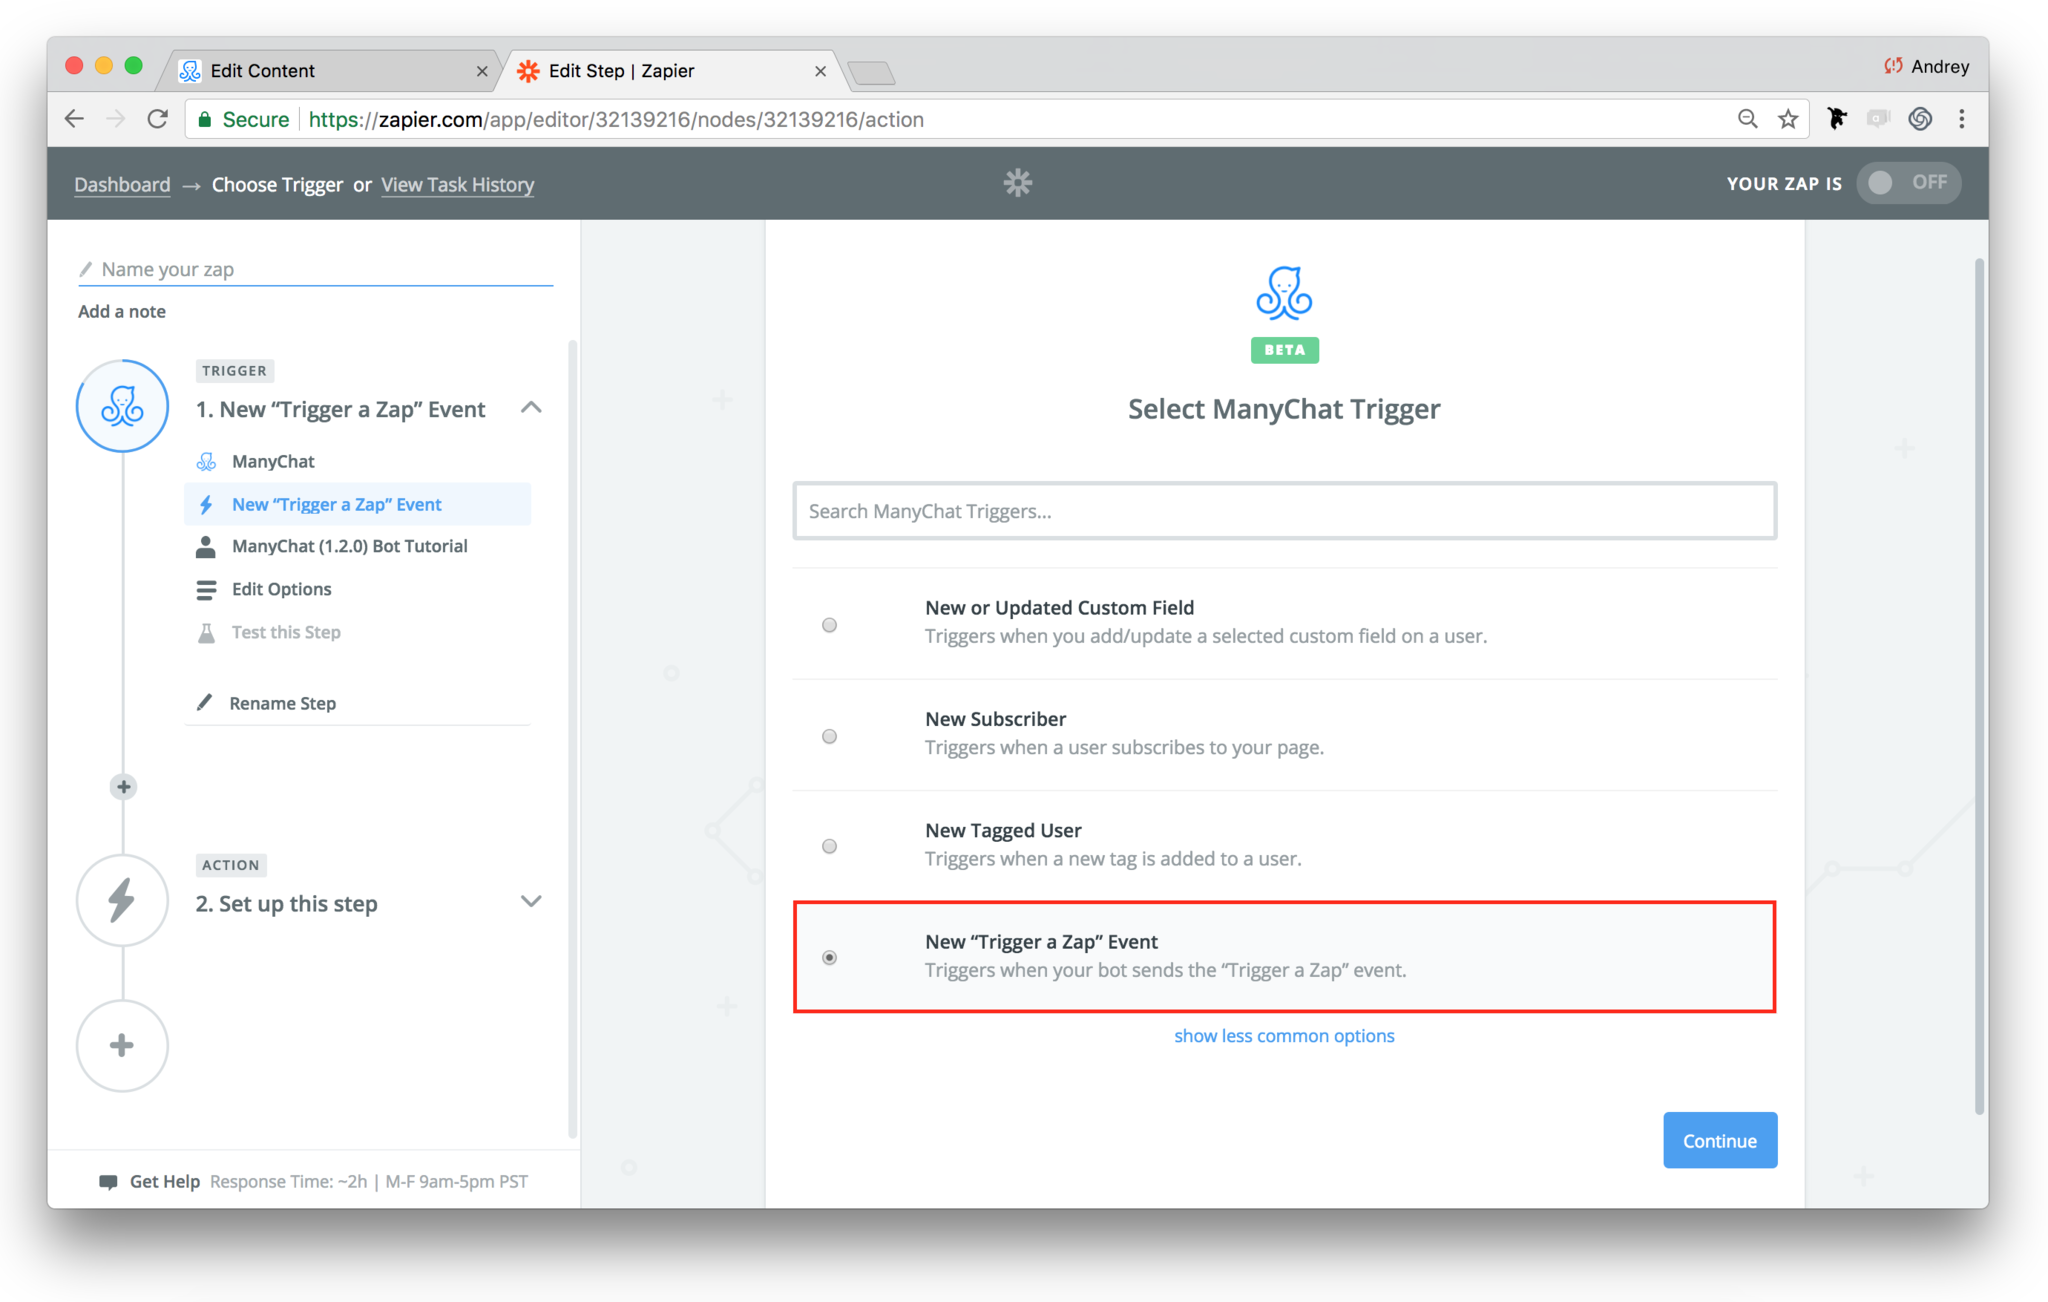
Now go to Zapier and create a new Zap with the Trigger a Zap option as a Trigger.
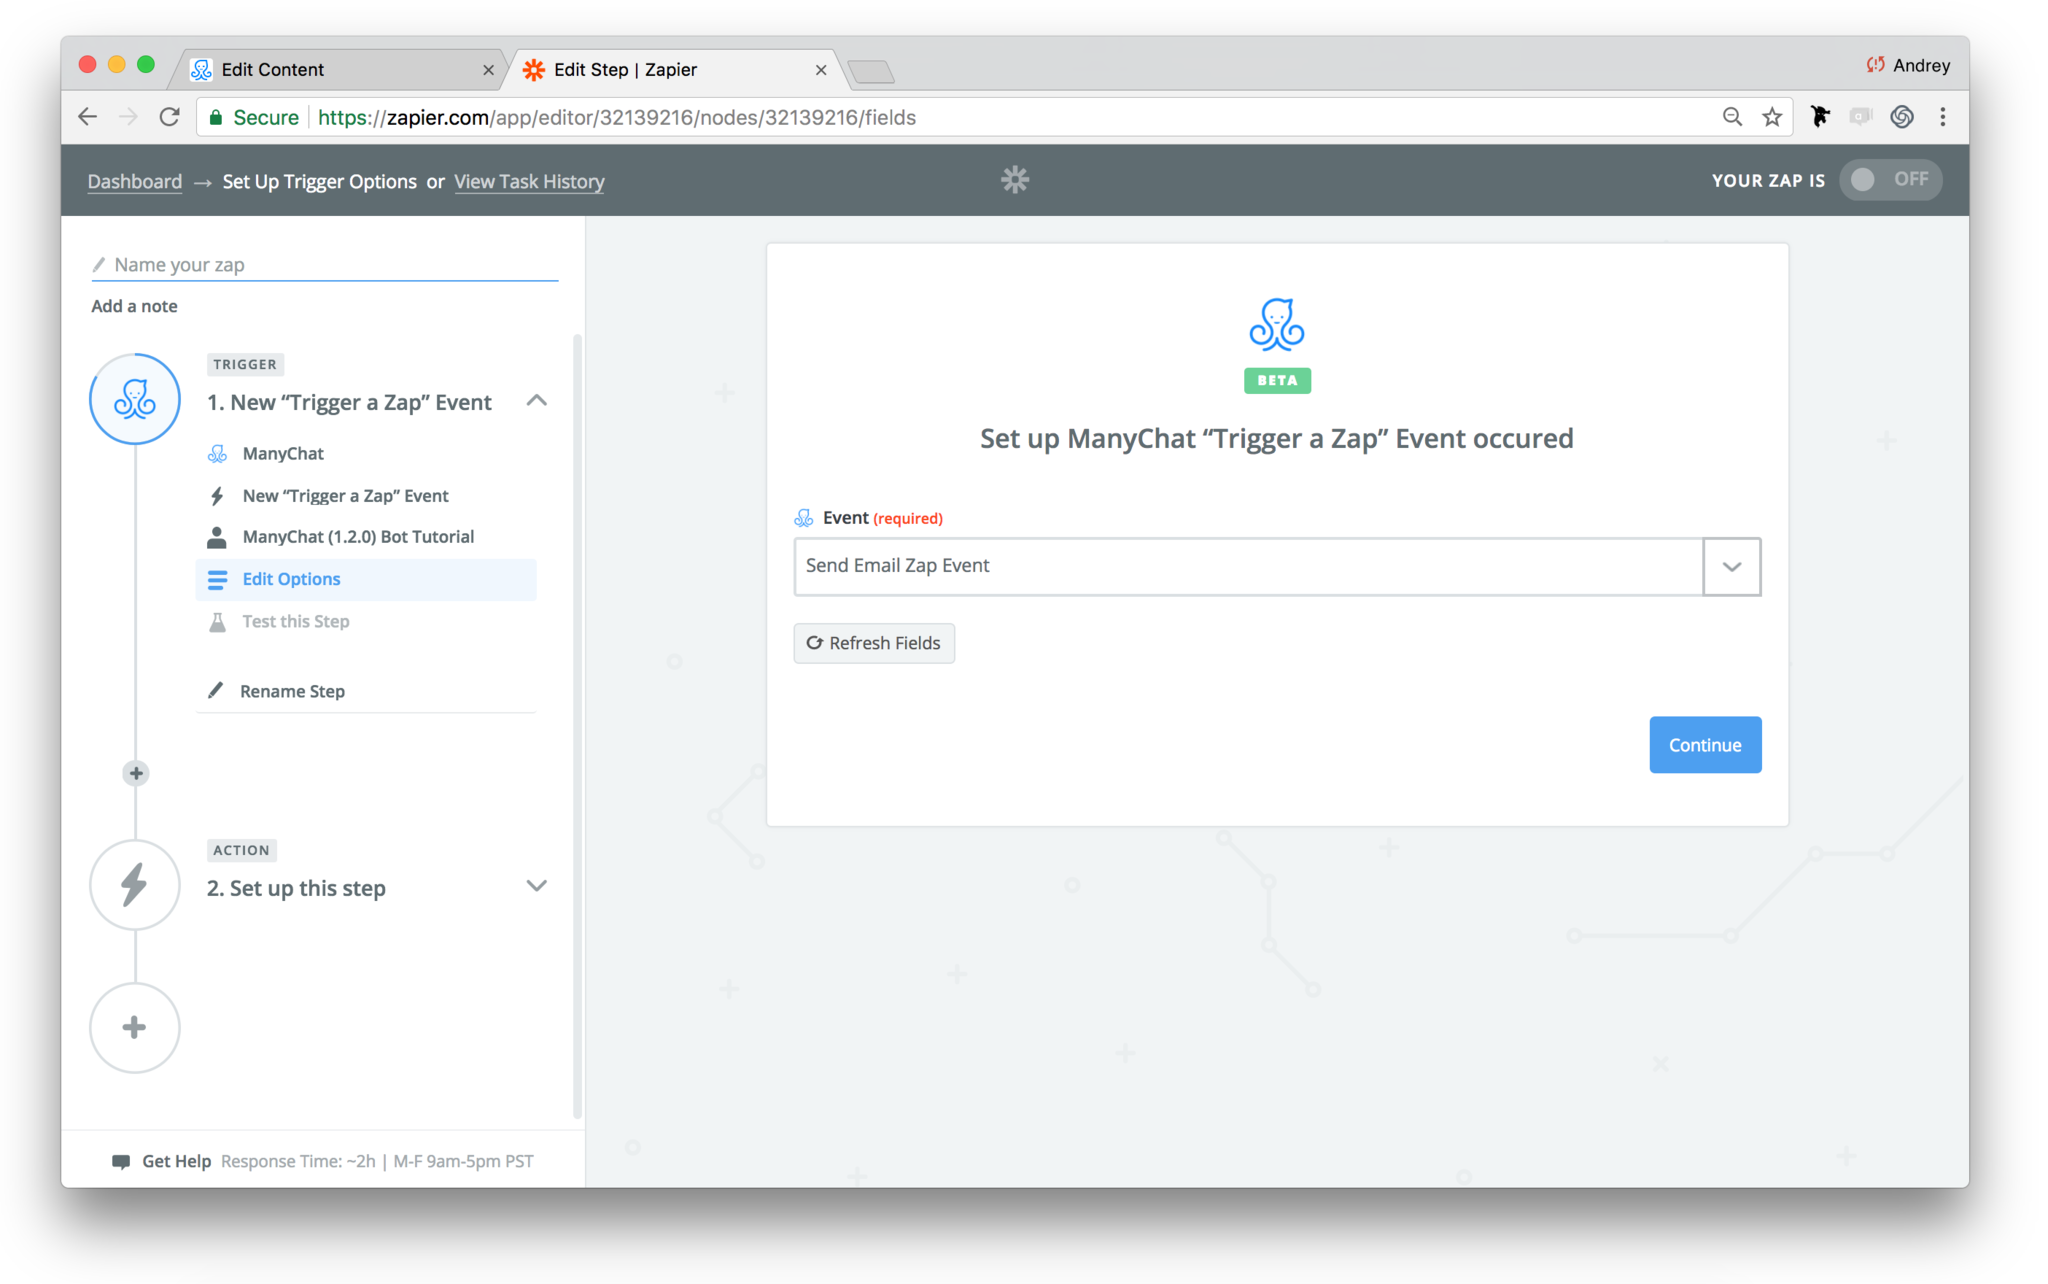
Select an Event you recently created in ManyChat in a drop-down menu. If you cannot find it there, press the Refresh Fields button so Zapier can fetch it from your Page.
After you add an Action app in Zapier and turn your Zap on, it will be automatically activated as soon as this event happens inside your bot.
Tracking your Zaps
Once you set up a Zap and activate it, you’ll be able to track your tasks in the Task History tab. This allows you to make sure everything works as expected so you can see all the tasks for each of your Zaps.
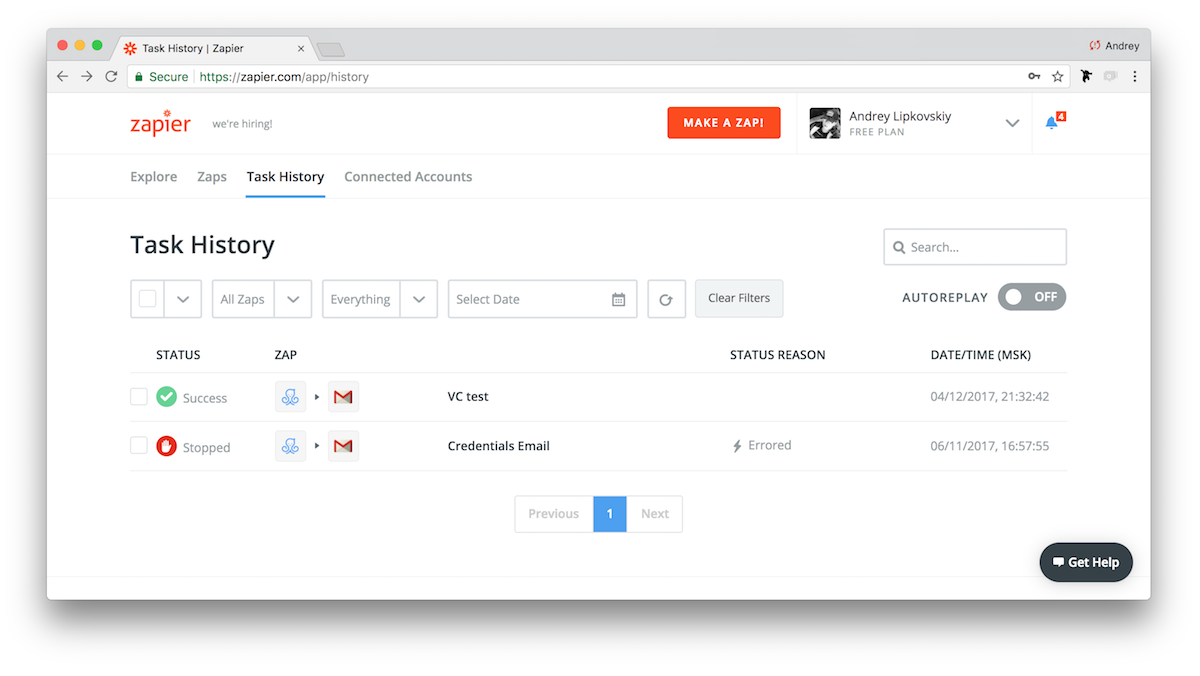
If something goes wrong, Zapier will return an error so you’ll be able to find out the problem. Click on the “Stopped” task to see the details.
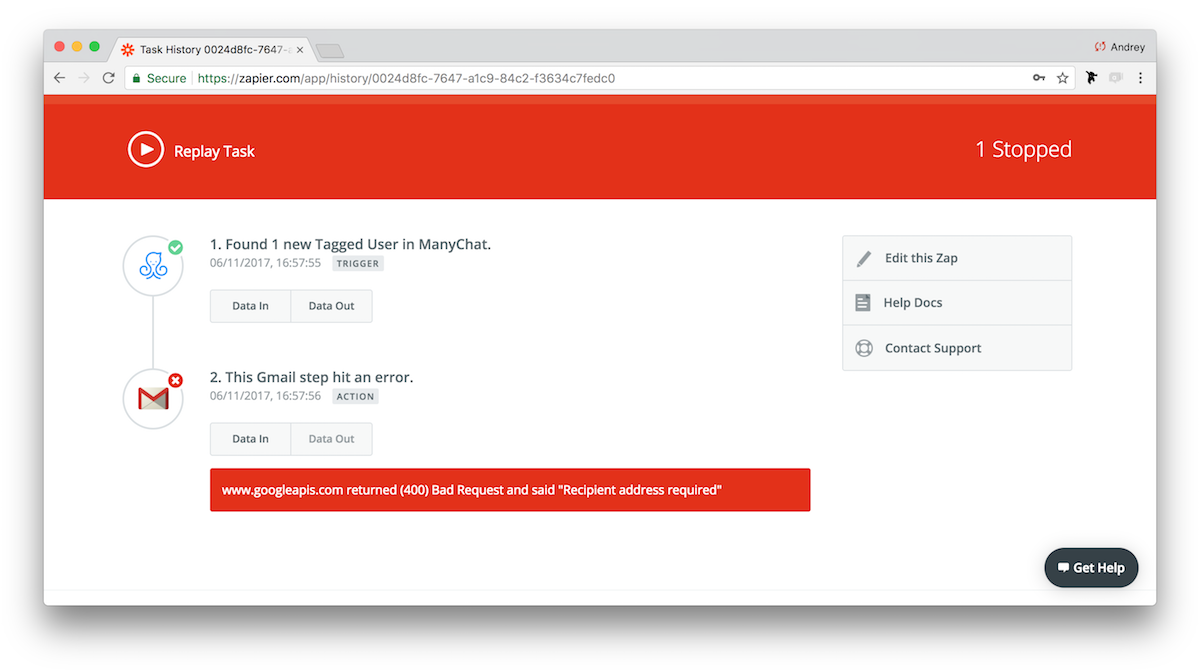
In this example, Gmail couldn’t send an email to the subscriber because of the wrong email address provided. The list below explains most common problems you can find in your Task History:
- No subscribers with tag found. Make sure you have at least one subscriber with a selected Tag.
- No subscribers with Custom Field found. Make sure you have at least one subscriber with a selected Custom Field.
- Custom Field not found. Make sure you have this Custom Field in a selected account.
- Page is not active. Check if your page is active and has no permissions error (go to Settings>Refresh Permissions to restore page connection).
- Required field is missing. You may get this error if a user’s Custom Field is empty, because a previous step didn’t provide the data it needed or you changed the Custom Field’s name in your ManyChat account. Fetch user data from your first step to proceed.
- Can’t add / remove Tag. This subscriber already have this Tag / this Tag was already removed.
- Can’t subscribe user to Sequence / unsubscribe user from Sequence. This user was already subscribed / unsubscribed from that Sequence.
- More than one user found. More than one user meets your search criteria.
- Page is not PRO. You subscription in ManyChat was expired or cancelled.
In your account settings you can manage email reports to stay updated on your automated workflows and manage alerts about failed Triggers and Actions.
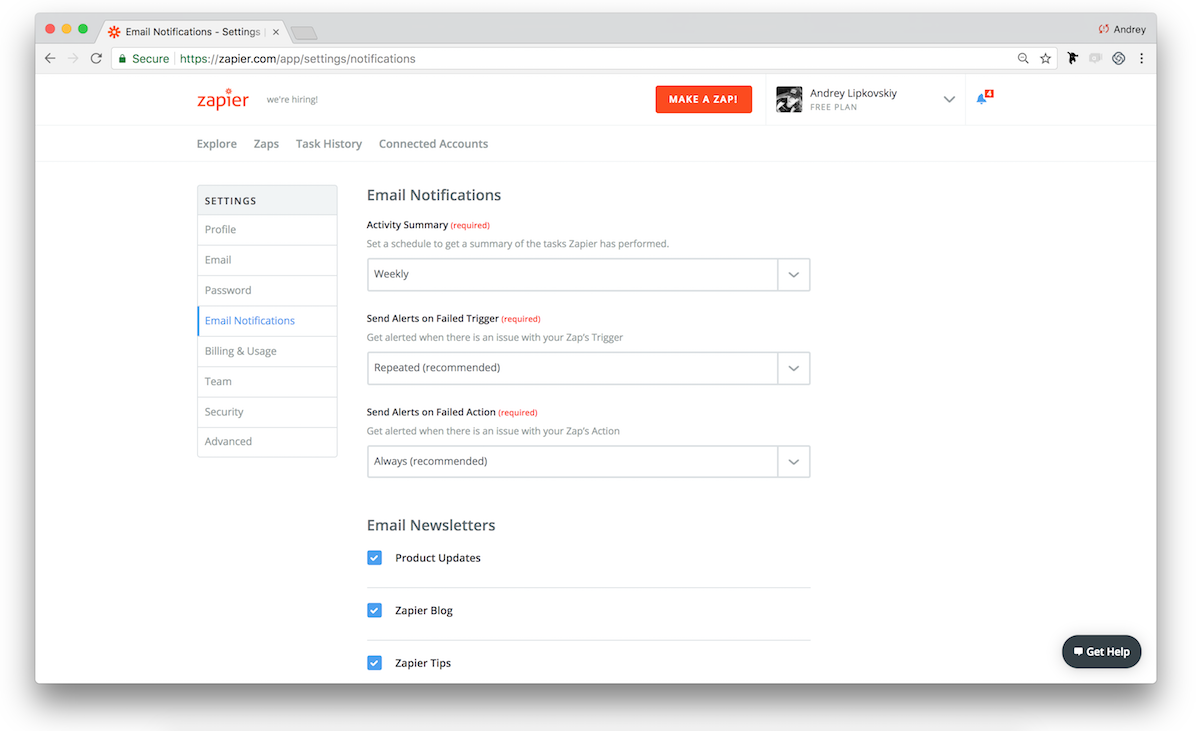
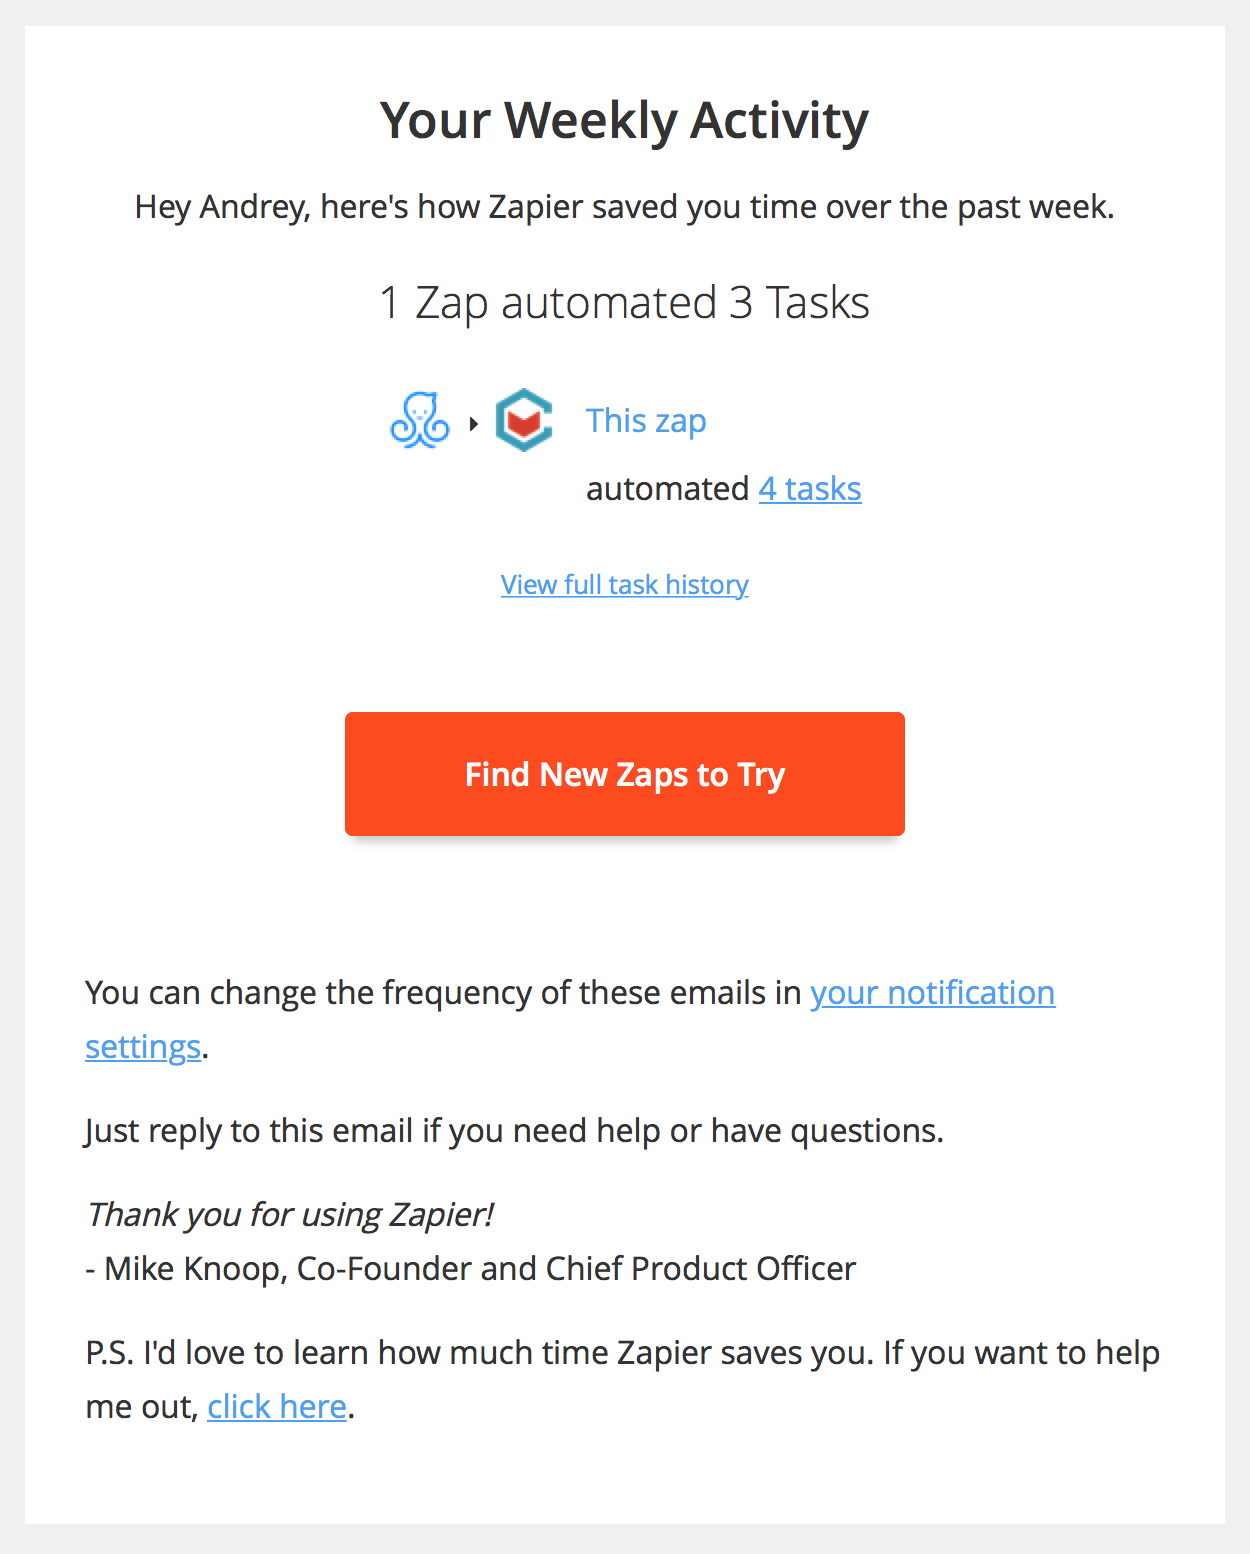
Set a schedule to get a summary of the tasks Zapier has performed and receive an Activity Summary once a day or once a week (you can also turn them off completely).
Zap Templates
ManyChat Zap Templates allow you to build the desired automation without starting from scratch.
After we launched the ManyChat + Zapier Integration, we asked our Community for the most wanted Zap Templates (so they could save their time connecting ManyChat to their favorite apps) and created these templates based on their replies.
You can save time and pick one of the desired workflows from this list or create your own—more of these will be added as time goes on, and we’d love to hear about the workflows you create yourself!
Zapier Video Tutorials
How to Use Zapier to Send Webinar Registrants From ManyChat to GoToWebinar
Want to increase your webinar signups and attendance rate?
Imagine being able to use Messenger to ask somebody if they want to attend a webinar.
Now, imagine that if they say “yes”, they automatically get registered in your webinar tool of choice!
Use the video below
How to use Zapier to integrate ManyChat with MailChimp
Do you want to use ManyChat to collect email subscribers? With our new Zapier integration, you can now ask people for their email address in a Messenger conversation and automatically subscribe them to your MailChimp list. Test it for yourself!
How to use ManyChat with Zapier
ManyChat + Zapier Integration workshop with Dan Gamito (ManyChat) and Tam Pham (Bot Academy). Practical cases and step-by-step instructions on how to integrate Zapier with Messenger.
ManyChat + Zapier Integration Example: Bot survey with real time results
ManyChat — Google Sheets — Klipfolio
This integration allows you to manipulate your data an create really amazing workflows. For example, you can visualize all the information you collect in ManyChat by building colourful charts based on you subscribers’ multiple replies. Messenger Marketing Industry Insights is a survey with real time results created by Franklin Cruz, the ManyChat Community member.
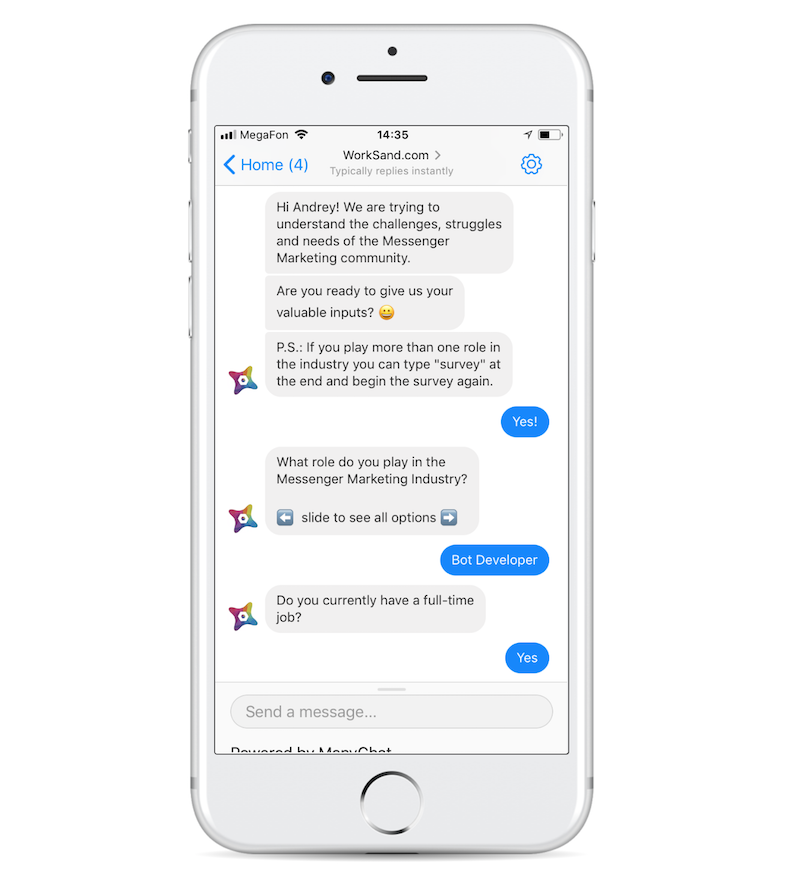
The survey starts right inside a bot with some questions about Messenger Marketing industry and tries to find out more about the participant’s role.
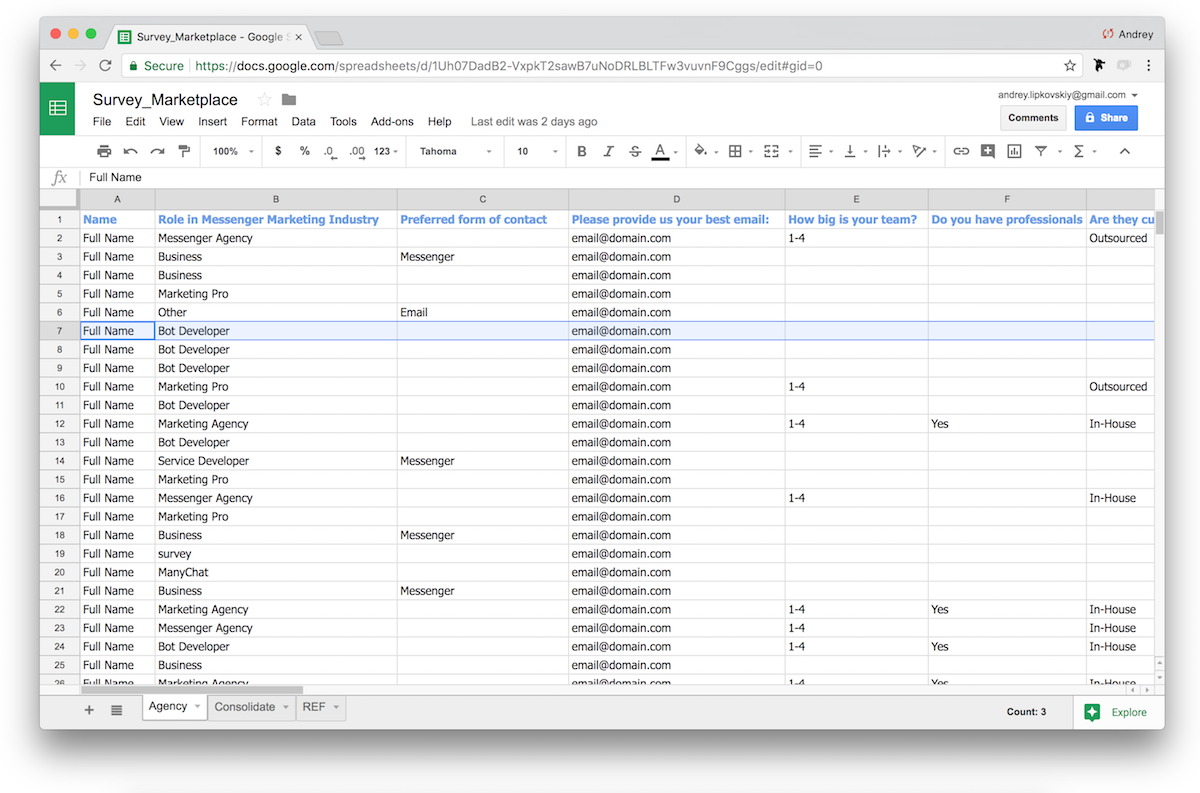
All the responses are stored in Custom User Fields and saved to a Google Spreadsheet by Zapier. As a result, Franklin had a spreadsheet with participants’ names and all their responses in a row.
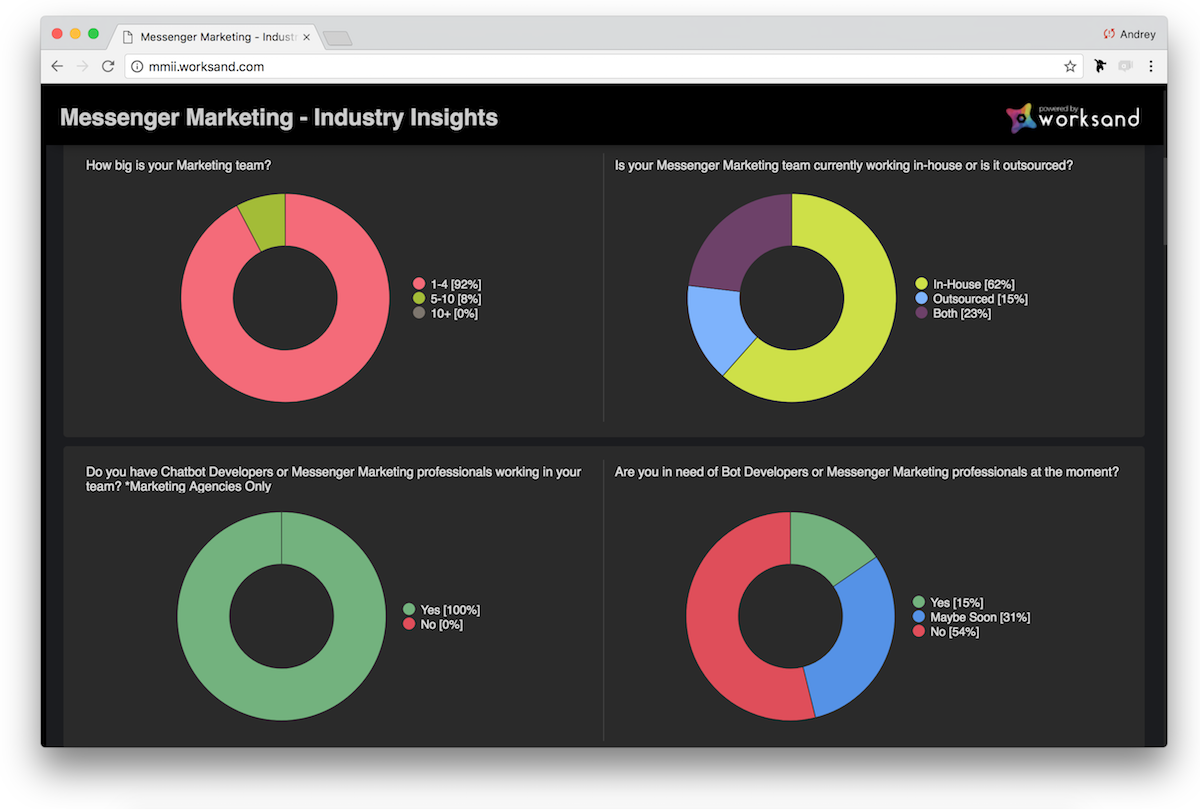
Next Zapier Action pulled this data out of this spreadsheet and built a chart based on a particular column data in Klipfolio so everyone could see the real time results on the website. At the end of the survey, participants get the link to track the results.
READ NEXT: [Zapier + ManyChat] 4 Ways to Integrate ManyChat into Your Business